Showing posts with label furniture. Show all posts

Friday, October 21, 2011

Adventures in Ridiculous, Or Our Trip to Ikea

Sure, let's drive two hours and buy a couch at Ikea in our seems-big-but-not-that-big Ford Freestyle. What could possibly go wrong?

When I think assembly required, I think of relatively flat boxes. Not so, dear readers, not so. Hmmm. Let's back up one step.

I needed furniture in the basement, but I didn't want to buy brand new stuff for the room no one sees when my living room furniture is 8 and 9 years old. 

So we took the loveseat and moved it downstairs. And had to get rid of the green couch because it wouldn't fit downstairs (and it was my least favorite of the two anyway).

That meant, I needed an affordable solution to get that much seating back into the room. Enter Karl. 

Whose full name is KARLSTAD, but we just call him Karl. (It's just necessary to call furniture from Ikea by its name. It just is.)

Packing him into the car involved taking most of the pieces out of their boxes. 
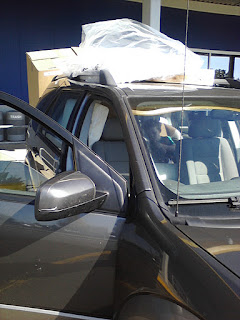
It was a bit like playing Tetris knowing you were given pieces that will never fit together.


Gabe's seat belt could not have been re-buckled if we took him out for any reason on the way home. We had planned to stop for lunch. Then Matt started to go through a drive-thru when I pointed out we won't fit with the stuff on the roof. 

I don't want to say Matt was a bit testy, but at this point his response was, "Fine, then I guess we just can't eat anything!" Or, we could send someone in to buy the food to-go. Which, of course, he came to his senses and that's what we did.


Then we got home and all the pieces in the house.
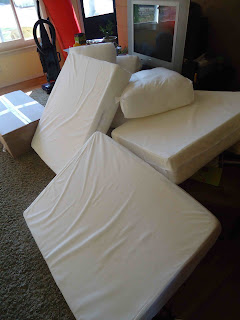

Someone told us they'd never buy a couch from Ikea because it's just all bolted together and that's cheap. Um, what do you think is holding together any piece of furniture you buy? You just don't normally see it. We've been happy with Ikea's quality.


It went together really easily and things just lined up right. 

The slip covers are nice and tight. Though, wow, it took a lot of muscles to get the cushions into them. They are made to fit perfectly! We picked the Sivik Dark Gray color. I really like it.


Of course it means I need to get to all the other updates in the room now. :) One thing at a time, right?


Here's my advice. If you are going to get a couch (especially a sectional) from Ikea, take a truck!

But, welcome home, Karl, welcome home.

This post may be linked at the following parties (for their Blog Buttons see my Link Love page): (M) Mad Skills , C.R.A.F.T., Amaze Me Monday, Sumo's Sweet Stuff, Singing Three BirdsMasterpiece Mondays, Making the World CuterA Little Birdie Told Me (T) Stories of A to Z, The Blackberry Vine, How To's Day , Type A, Amaze Me August, Ten Buck Tuesday, Handmade Tuesdays, Anything Related, Tuesday's Treasures, Strictly Homemade, Show Me What Ya Got, Time to Shine,  (W) Wow Me Workshop Wednesday, Whassup Wednesday, Blue Cricket Design, Look What I Made, What I Whipped Up, The Trendy Treehouse, Wicked Awesome Wednesday , Good Life Wednesday, Inspiring Creativity, Sweet Peas & Bumblebees (TH) Beyond the Picket Fence  Creative Juice, Somewhat Simple, Thrifty 101 , Smilemonsters , Everything But the Kitchen Sink, Shabby Chic Cottage, Thrifty Thursdays, House of Hepworth's, Thrilling Thursday, (F) Fingerprints on the Fridge, Furniture Feature Friday, SevenThirtyThree , Lovely Crafty Weekend , Simply Designing, Creative Corner, Tickled Pink 504 Main, Inspiration Friday at The Picket Fence, Friday Flair, Remodelaholic, For the Kids Fridays, Frugal Friday, Craft GoodiesFlaunt It Fridays , Thirty Handmade Days (Sat) Tatertots and Jello , Anything Goes (Sun) Creative Blog & Hop, Sundae Scoop, Under the Table and Dreaming


Wednesday, July 27, 2011

Trash to Treasure

 A long time ago, I mentioned that I had snagged a couple of chairs from the side of the road. There was nothing wrong with them but a bit of ugly.


The mission was to paint and change the fabric. So off came the cushion. And the chair was sanded. (I could have sworn I took pictures of this part, but I can't find them.)

I used Rustoleum's Heirloom White spray paint. Each chair took a can and a half. I'm not getting perked to say this, but I think the claim that a can of Rustoleum covers twice as much as other brands is true. I does seem to cover more than others, but that said, you have to go with what you like.


After painting, I decided to distress them a bit. I just hit them in the places that might sustain wear with my hand sander, Hermes. Yes, I named him. Doesn't everyone name their tools?


And remember how I waxed poetic about finishing wax in this post? (Pun intended, of course!) I rubbed on a coat of the wax paste, let it dry about fifteen minutes, and then buffed. I love how wax finishes pieces!


On to the cushion. I needed my new fabric, scissors, and a staple gun. Staple guns are awesome and useful for so many things. Seriously, go get one if you don't have one.


I laid my cushion on my fabric and cut around to size with a few extra inches all around.


Then I stapled one staple in the center of each side. Pull taut, but don't over do it. If you have a pattern like my toile you risk making the pattern skewed.


Then I worked along the front and stapled across the whole side, then back and then each side. For the corners, staple in very close to the corner. Fold and tuck the excess fabric (not unlike wrapping a present), 

pull tight and staple like crazy.


Once secure, trim excess fabric. And repeat with the other corners. 


You will have something like this:

Now it's time to re-screw the cushion to the chair.


I really love the toile with the distressed white chair.


And the distressing worked, but I think it was more dramatic on the black desk.

I like the desk and I like the chair, but the jury is still out on whether or not I like them together. I never really planned on keeping the chairs, I just didn't think they should be trashed. I may still just sell them.

This post may be linked at the following parties (for their Blog Buttons see my Link Love page): (M) Mad Skills , C.R.A.F.T., Amaze Me Monday, Sumo's Sweet Stuff, Singing Three BirdsMasterpiece Mondays, Making the World Cuter, Sarahndipities, A Little Birdie Told Me (T) Stories of A to Z, The Blackberry Vine, How To's Day , Type A, Amaze Me August, Ten Buck Tuesday, Handmade Tuesdays, Anything Related, Tuesday's Treasures, Strictly Homemade, Show Me What Ya Got, Time to Shine, Show Off Your Crafty Side (W) Wow Me Workshop Wednesday, Whassup Wednesday, Blue Cricket Design, Look What I Made, What I Whipped Up, The Trendy Treehouse, Wicked Awesome Wednesday , Good Life Wednesday, Inspiring Creativity, Sweet Peas & Bumblebees (TH) Beyond the Picket Fence  Creative Juice, Somewhat Simple, Thrifty 101 , Smilemonsters , Everything But the Kitchen Sink, Shabby Chic Cottage, Thrifty Thursdays, House of Hepworth's, Thrilling Thursday, (F) Fingerprints on the Fridge, Furniture Feature Friday, SevenThirtyThree , Lovely Crafty Weekend , Simply Designing, Creative Corner, Tickled Pink 504 Main, Inspiration Friday at The Picket Fence, Friday Flair, Remodelaholic, For the Kids Fridays, Frugal Friday, Craft Goodies, I'm Lovin' It, Flaunt It Fridays , Thirty Handmade Days (Sat) Tatertots and Jello , Anything Goes (Sun) Creative Blog & Hop, Sundae Scoop, Under the Table and Dreaming

Thursday, July 21, 2011

Craigslist Desk

I've been trying to have success with Craigslist forever now. I finally had luck and scored this desk:

for thirty dollars. It needed refinishing, but it was a great find.
 
After a sanding and a little bit of patching, I painted the desk flat black. I used Valspar Latex Enamel which you get at Lowe's near the spray paints.

Once it was dry I got out the sander and distressed it. I don't often do this, but I was really pleased with the results.


Then I tried finishing wax for the first time. After talking to a man that restores furniture, I really wanted to try Briwax, but there isn't a supplier here and I was too impatient, so I just tried Miniwax.

I LOVE it! The finish is protected and so much richer now. I seriously want to just go around and wax everything now. :)

It was super easy. Wipe it on, let it dry for fifteen minutes and buff.

In the down time, waiting for the paint to dry, I worked on the hardware.

The patina had a certain charm, but I really wanted silver accents. So, out came the silver leaf Rub n' Buff.

It takes just a little bit. Rub it on, then buff it a bit. Easy peasy.


I am so happy with this piece.


This post may be linked at the following parties (for their Blog Buttons see my Link Love page): (M) Mad Skills , C.R.A.F.T., Amaze Me Monday, Sumo's Sweet Stuff, Singing Three BirdsMasterpiece Mondays, Making the World Cuter, Sarahndipities, A Little Birdie Told Me (T) Stories of A to Z, The Blackberry Vine, How To's Day , Type A, Amaze Me August, Ten Buck Tuesday, Handmade Tuesdays, Anything Related, Tuesday's Treasures, Strictly Homemade, Show Me What Ya Got, Time to Shine, Show Off Your Crafty Side (W) Wow Me Workshop Wednesday, Whassup Wednesday, Blue Cricket Design, Look What I Made, What I Whipped Up, The Trendy Treehouse, Wicked Awesome Wednesday , Good Life Wednesday, Inspiring Creativity, Sweet Peas & Bumblebees (TH) Beyond the Picket Fence  Creative Juice, Somewhat Simple, Thrifty 101 , Smilemonsters , Everything But the Kitchen Sink, Shabby Chic Cottage, Thrifty Thursdays, House of Hepworth's, Thrilling Thursday, (F) Fingerprints on the Fridge, Furniture Feature Friday, SevenThirtyThree , Lovely Crafty Weekend , Simply Designing, Creative Corner, Tickled Pink 504 Main, Inspiration Friday at The Picket Fence, Friday Flair, Remodelaholic, For the Kids Fridays, Frugal Friday, Craft Goodies, I'm Lovin' It, Flaunt It Fridays (Sat) Funky Junk InteriorsTatertots and Jello , Anything Goes (Sun) Creative Blog & Hop, Sundae Scoop

Monday, June 6, 2011

Summer Lovin'

I love what a difference a can of paint can make! We had this wicker chair,

that was looking a bit worse for wear. It used to be an indoor chair, and I didn't need it anymore so it became an outdoor chair. First I cleaned it.

Then I picked a color that screamed summer:

Rustoleum Summer Squash

I sprayed and sprayed. Here's a tip I discovered with this chair. You know that recommended 8 inch distance and broad sweeping motion with spray paint? Yes, it's true and necessary with a flat surface (or it will drip and run), but with wicker I needed to get up close and personal. I think because it's an open weave. I just know a 3 inch distance and short strokes worked better and I had no problems with dripping.
The paint helped so much!


But then it took forever to find a cushion. Here's the old one:
It's okay, not terribly exciting though, and that is an indoor cushion. I'll never remember to bring it in all the time. I even looked into outdoor fabric, and our local store had nothing I liked and all the outdoor fabrics were $20 a yard. I don't think so.

I finally found this orange one at Target for $15, 

but woh-woh, it's a bit too small. Grr!
For now, I'm keeping the orange because I like the color and it's comfortable even if it doesn't fit perfectly.

So, the cushion isn't going so well, but the wicker looks so much better in the sunny yellow color! 


Monday, April 18, 2011

Cool and collected

I attempted to make my end tables darker, but failed
as you can see. You can read about the drama in this post.

Then the good people at Valspar had a free paint sample giveaway. Choose your own color and all. You have to like them on facebook, but I got in at the end. I believe I heard it is over now. But feel free to double-check. I can't be sure.

So, I chose Sonic Sky


with my poor end tables in mind. I thought at first I might go with a whole distressed thing, but upon the first coat of paint I was loving the clean crispness of the color.


So, I painted one and I'll live with it for a week and then decide to keep it or distress it. 
 Feel free to vote in the comments section.


 Next post, I'll explain how I knew a light blue that did not "match" ANY OTHER color in the room would work. It will be color theory 101. Stay tuned...

Linking to:
Centsational Girl

Thursday, March 24, 2011

Furniture Redo

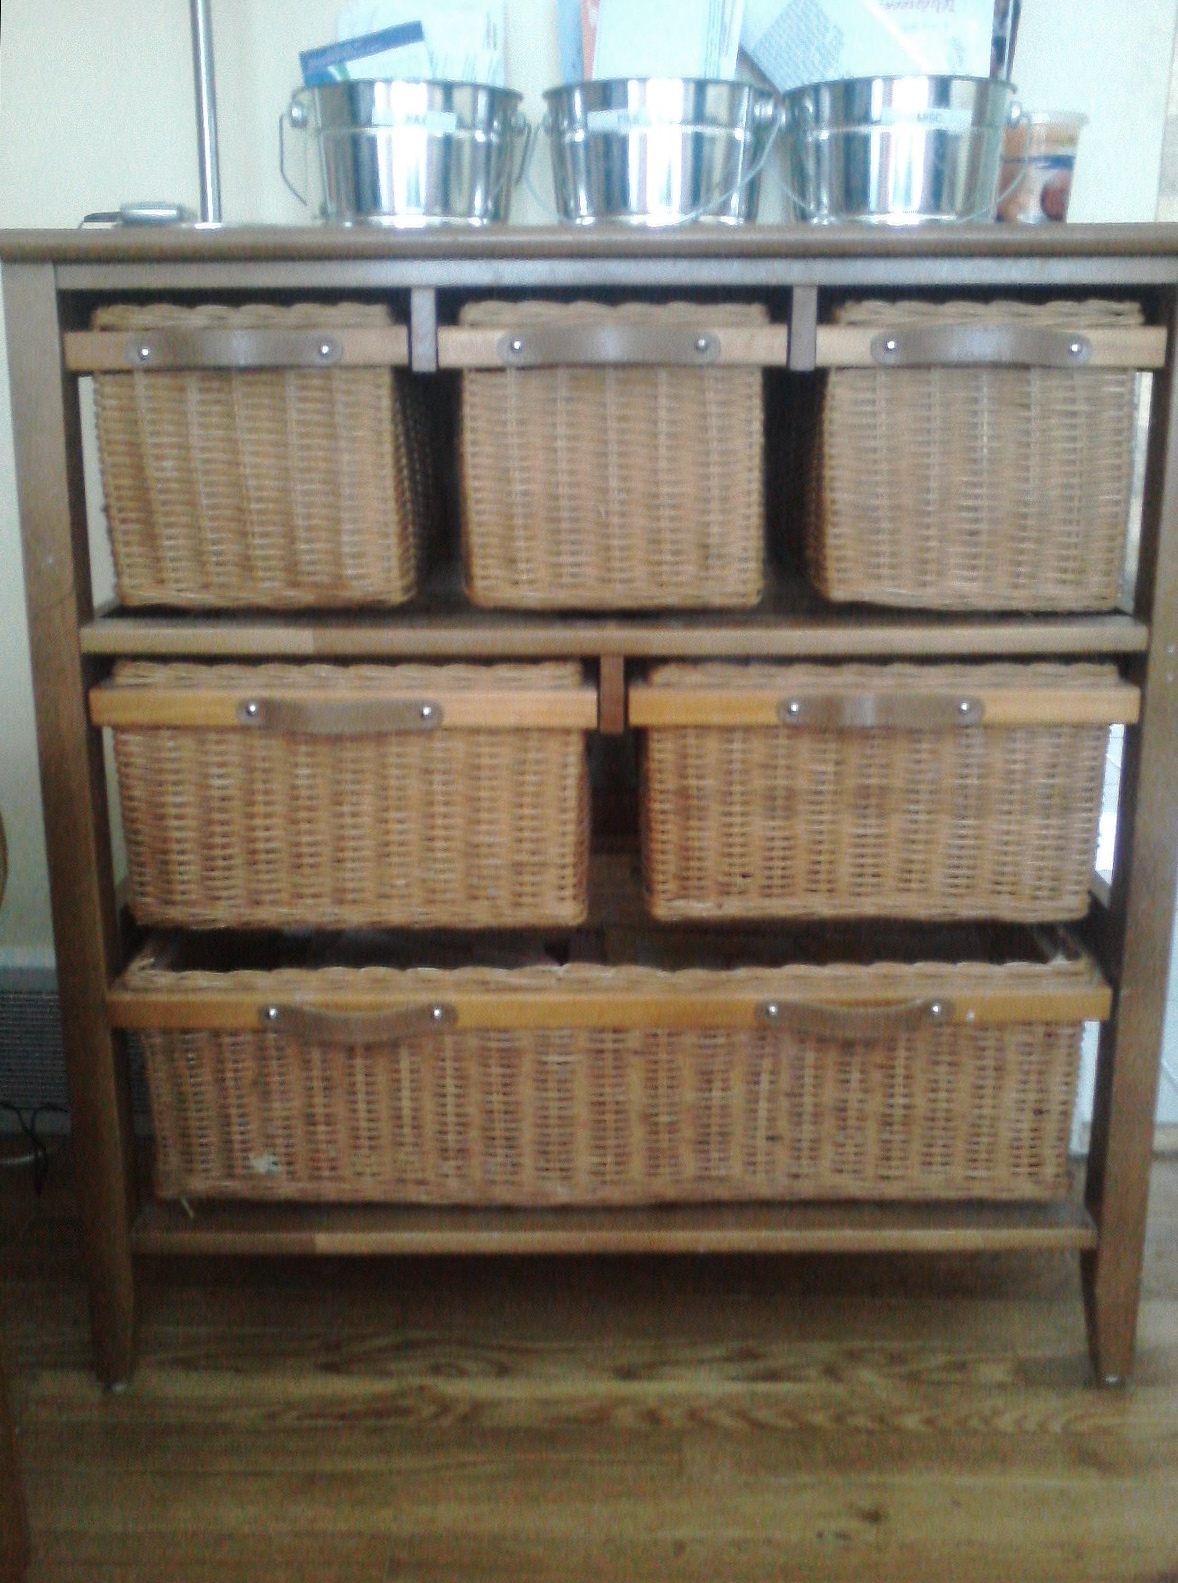
This wicker basket dresser has been with us for almost seven years. It started out life as baby dresser/changing table. Come to think of it, I should do a post on how to make your own changing table out of a dresser. But that is not what this post is about. 

We used this for both boys until their clothes were too big to fit. I used it a short time while in between dressers, it made a brief stint as kitchen storage, and now it holds school papers and mailing supplies and has the mail organizers on top.

Actually, it is the drop zone where junk piles up. Sigh.

So, the color wasn't working for me. It was fine In the beginning... (it's hard to say that phrase normal and not all Charlton Heston-y, don't you think.) But now I'm over the mid-tone wood.
I was going to do a whole tutorial post, but seriously, it's spray paint. I don't think you need during pics. I took the basket drawers out and sanded. Then grabbed some handy-dandy black satin spray paint (I started with Krylon Satin Black, but then ran out and finished with Rustoleum Canyon Black), and sprayed light even coats. Lots of them. My hand still feels kind of crampy today.

So, what do you think? I love the black. It makes the wicker color look richer. I could have gone white, but I have little kids. For realz, they mess up white stuff. And, I already have black accents, so this was the best choice for us.

I wonder if I should paint the wood brace that goes around the wicker basket. I think I would like that, but the leather handles cannot come off, so that will be tedious work with a small paint brush and paint. So, we'll see.

Linking to:
Fingerprints on the Fridge

Furniture Feature Fridays

Wednesday, February 9, 2011

Before and After: Artspace

Okay, the first project, Mission: art space and organization, is complete-ish. Basically, it's close enough. Do you have projects in your life that still need tweaking, but you've had enough, it's close enough so you are moving on? Sometimes it feels like my whole life needs a good tweaking, but it's close enough. ;)

So, to recap, Dilemma: no space for art supplies or in which to create.
Enter, two bookcases that their former occupants (books) outgrew.


So, this picture is just at the beginning of trying to organize the mess. Mateo helped position and secure the bookcases and I began to go through my two big Rubbermaid-type totes that I had crammed most of my art supplies into.

Enjoy this shot of the mess:


I also have lots of canvases, portfolios, large sketchbooks, old drawings and things of that nature that needed a home. They have not been lovingly cared for all these years. They've been shoved under beds, jammed in closets, and enough was enough. They may not be Picassos, but they deserved better treatment.

Solution: large table with storage underneath.

We used a bi-fold closet door that we found on the street. Mateo cut it in half width-wise, and the halves became the top and bottom of the piece. He built a frame out of 2 x 2's and used luan (a thin plywood type product, other accepted spelling luon) to make the sides. We had to have our table raised to clear the vent. 

Mateo placed duct work inside and remember to leave an opening in the front so we still have heat in that part of the room. Yay!


I painted it a creamy yellow because I happened to have some left (free is always good!) and I had intended to paint the top, but I changed my mind and will stain it. To cover the crease made by the doors, Matt is adding a piece of luan. It's thin, so it won't add any more height and it has a nice wood grain so it will look good stained. Bonus: the darker stain color will hide more marks and spills than the paint. We will seal it of course. 


We never added the vertical dividers in the bottom. Read this post to know more about that. And this post too. But, it works anyway. It still gives all those large paper and canvas items a place to live. 


The height is great. I can stand and work (it's a little higher than standard counter height) which I do a lot or I can use a high bar stool. The organization on the shelves could use some perfecting (i.e., cool boxes and containers) but it is so much better than Rubbermaid crates! Now I can see what I have so I don't go wasting money on more of something I already had. Awesome.


You may not have a bunch of art supplies, but this type of space could be useful to those who like to scrapbook, build models, or even sew. (I have my sewing machine down in the bottom, ready to set up in a flash.)


Thus endeth the before and after of my complete-ish first blog project. Up for February: fabric time!

Linking up to:
http://thriftydecorchick.com/
http://www.bluecricketdesign.net/ 
http://www.elements-interiors.net/