Thursday, October 9, 2014

Hiya

That's how we say hello in Scotland.

Yes.


Scotland.

So, grad school has taken me on a new adventure and I am spending a year abroad in Glasgow.

It's a little hard to DIY your home when you are not currently living in it. It just occurred to me that I've been kind of quiet for a bit too long, and I realized that I should explain myself.

Now, this isn't the end. (Just read that Young House Love is calling it quits and that is always sad -- well, keeping it honest, annoying as all get out when a go-to blog is no longer around.) I know I've back so far off posting that it's almost like I'm not around. But I have no intention of calling it quits. So, I wanted to say that I will post a few relevant things while I am here.

My kitchen here is quite different from the US and there are a couple of super clever design ideas in it. I've been inspired, peeps.

And, soon, I will snap some pics and share.


(No, I haven't had haggis yet, but I will. Oh, I will.)

Tuesday, August 12, 2014

'Snow Party Like a Snow Party

It's funny to write about a winter party in the summer, but classes and studying have kept me busy.

Chi had his first big, get to invite the whole class birthday party this year and we had a Snow Party!

First, I'll show you what I did for a take-home goody for the guests. I do not believe in goody bags of trinkets, but I try to send the guests home with a little something.

This year was a No-melt Snowman Kit:

Supplies needed are:  

small mason jars, cupcake liners, small styrofoam balls, 3 toothpicks (we used the fancy kind that have one blunt end), 10 mini brads per snowman, orange pipe cleaner (or whatever we are supposed to call them nowadays!), strip of colorful felt, and instructions.


Just make an assembly line and place each item in a jar.


Be sure to add a slip with assembly instructions on it.

Then place the lid on top, add the cup cake liner and then screw the ring on.


And now I should show you and assembled snowman...

sigh. I never took a picture of a complete one. But, you can imagine, they are super cute.

On to cake.


I made a snowman cake and snowball cupcakes.


Mini marshmallows pressed into the frosting of the cupcakes made the "snowballs." 

The bottom "ball" of the cake was made like the Bomb cake. The top "ball" is actually a frosted styrofoam ball because I needed it to remain light.


Chocolate chip eyes, mouth, and buttons. Baby carrot nose. Fruit by the Foot scarf.


I served the cupcakes (along with ice cream cups) to the kids and saved the snowman cake for the family celebration later.

Most of the party was held outside - in the snow - as a Snow Party should be. :)

I broke the kids into smaller groups and cycled them through several games, with the help of many of the other parents.

They did Ice Bowling.


We froze six water bottles for the pins and used a volleyball.

Target Practice.


We froze colored water into regular ice cubes. Then the kids stood back and tried to hit the bulls-eye which was created by spraying colored water on the snow.

Snow Long Jump.
Just as it sounds.

Snow Painting.


I made frames in the snow by repeated dropping an empty frame in the snow. Filled several spray bottles with different colors of water. Then let each child "paint" their own picture.


My lawn was so colorful. :)

We also just let them build snowmen. We had lots of color ice cubes left over from the target game so they used them up for decorations.


One tip, when you transition inside for cake and ice cream and presents, have a garbage bag with each guest's name on it. Stuff their boots, coats, mittens...all of it, into their bag so you can find it later. And, so your house stays relatively dry.


I also laid down blankets and drop clothes to absorb the water.
 

All in all, this was a successful party for a winter birthday boy. 


Garden Path - The Final Frontier

It's well past time for the (apparently semi-)yearly Garden Path update. I have promised to keep it real, so here's the lowdown.

It's been two three years. Regular readers may recall that two years ago (the year after we made it in the first place) we re-did the path due to some bad weathering. The last two springs our whole back yard flooded. 

Before the flood last year, the path was in okay shape. I took a peek between the snow melt and the deluge. But once the water receded this is what I found:

The disks had floated up, some clear out of the garden. Sad day.

Honestly, I couldn't make up my mind for awhile on whether on not I wanted to fix it. The disks were in good shape, so it just would have been a matter of resetting them. But would I be doing this every year?

After making our path the first time, I discovered that the original pin I'd seen was from a home and garden show where it was never exposed to the elements. So after contemplating all my issues with it, including knowing it is incredibly popular and people seem to want it to work, I finally came to the conclusion that it's just not worth it to keep it.

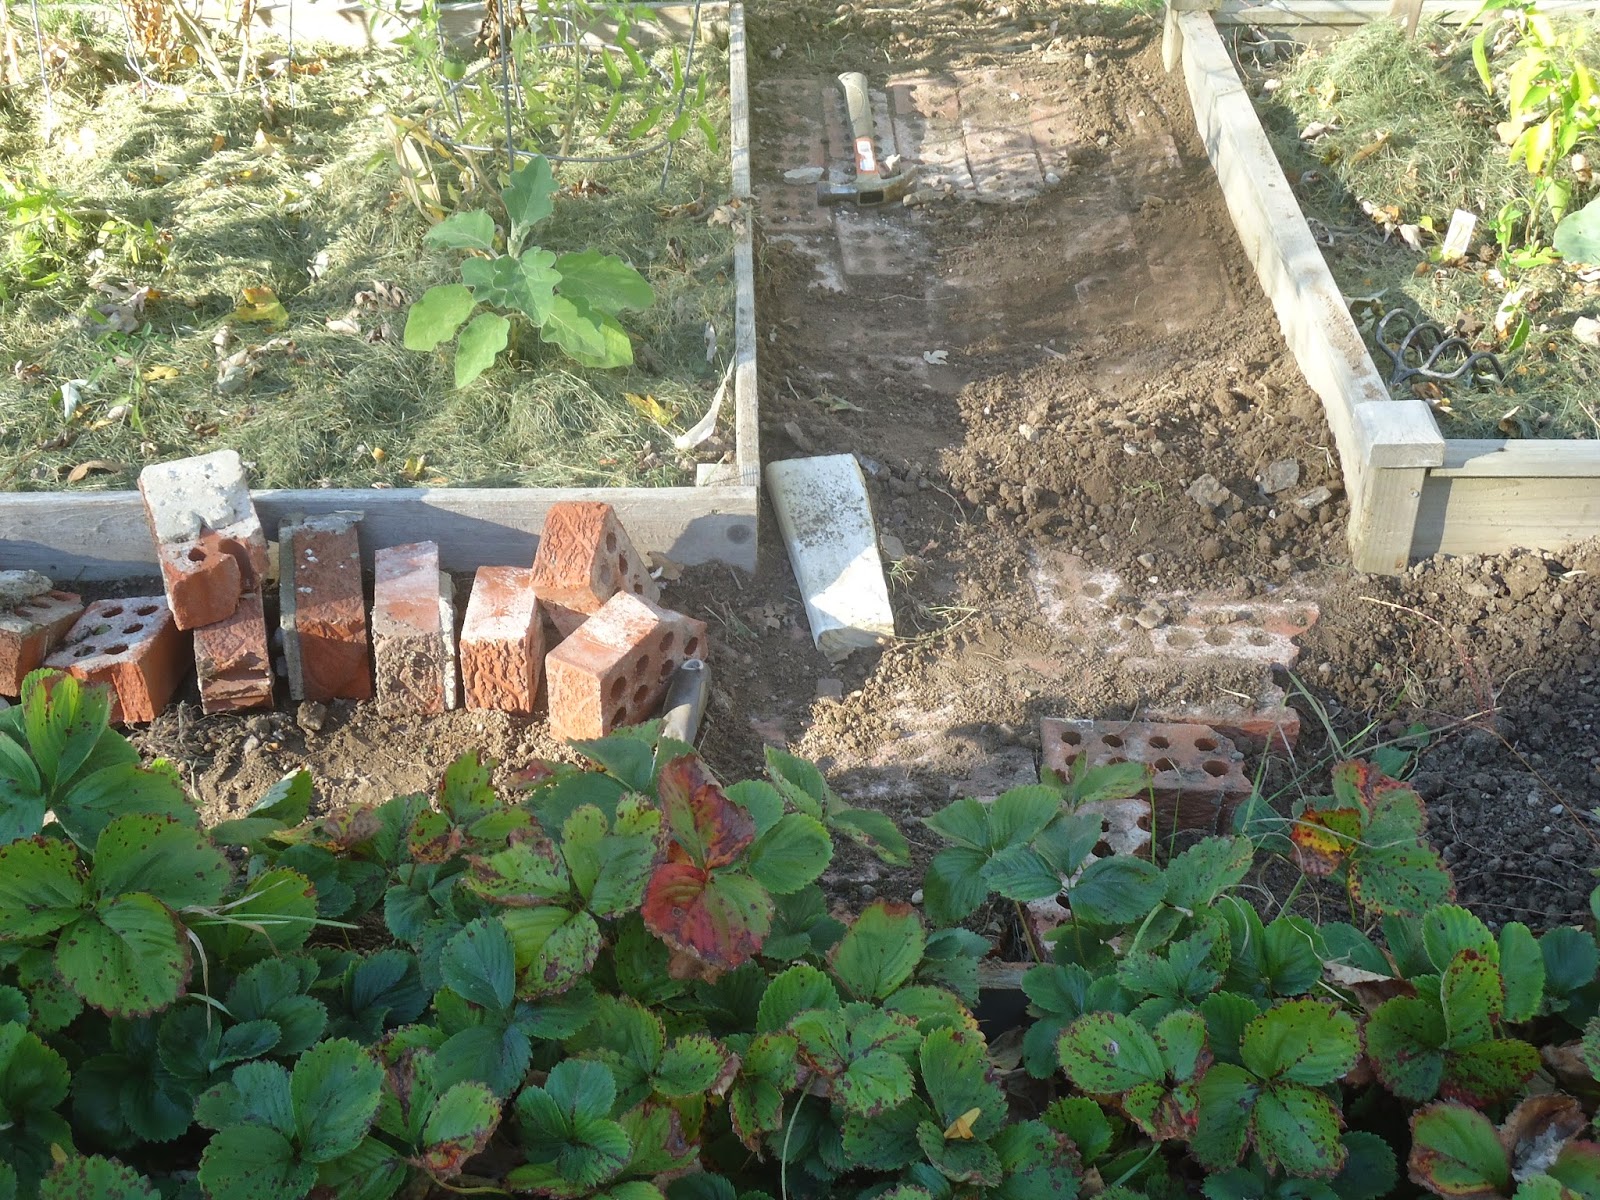
Well into the fall, when I finally decided, Matt and I began to rip out all the disks and Matt started to replace the path with bricks.

We still had bricks leftover from the patio project, and I thought it would nicely tie things together.

However, instead of laying them smooth side up, I chose to have the holes exposed. It adds interest, drainage and traction.

After setting them in, Matt back filled with the dirt. This not only helps pack them in place, but fills the holes making it look nicer.

But that's about as far as we got last fall before hard frost set in and we had to give it up until spring.

Good news/Bad news. It flooded again. But that let us see how even incomplete the path stayed in place. So, forward ho! 


Now it's done. And I actually kind of like better than the wood. (Even though the wood was super cool, I know!)


I have had to weed it a bit, but a ground cover growing in the holes and cracks is always an option.


So...forgive me for abandoning the wood path?

You've gotta admit, the brick is still a bit quirky and interesting laid this way. :)


Wednesday, June 4, 2014

Take a Seat

So, I was driving down the road and I saw a chair. 


Around these parts we have "free" (property taxes, but worth every penny!) heavy item pick up so each part of the city on their designated week sets out big stuff they want to get rid of, but often it's decent stuff that someone just doesn't want to mess with anymore. So you can snag some really cool stuff for free if you keep your eyes peeled.

I checked the chair over; I knew it had only been outside for a maximum of two hours since I'd just been down that street earlier in the morning, and discovered a dog had clearly tried munching on it.

Otherwise it was in good shape and I really needed something for the basement. So I sanded it really good. (And got a splinter in the process, sigh.)

I decided not to try to patch the armrest where a chunk of wood was missing. I don't need this chair to look perfect, it's just a spot to plop down when playing Wii. 

Then I spray painted it with Rustoleum with built in primer. It's actually for outdoor use so I expect it will be durable. I don't think it was labeled with a color name but it's a dark taupy gray. 

The cushions were in great shape and a neutral tan so I just cleaned them.

Is it the best chair ever? No, but it was free and it's quite comfortable. Now I don't have to worry about extra seating in the basement for awhile.